While not every shop will need this advanced setup, it provides a seamless way to manage and print order receipts through network-connected receipt printers.
This feature is ideal for stores with multiple printing needs, such as assigning specific printers for different kitchen stations using the Tags system. While a simpler setup using Bluetooth printers or handheld Sumni devices is also supported, the Raspberry Pi offers advanced functionality for larger or more complex operations.
What’s Included in the Setup Box
When you receive your setup box from CheckoutNgo, it will contain:
- A pre-configured Raspberry Pi
- A Micro SD card preloaded with your shop’s ID and required software (already installed onto the Raspberry Pi)
- A power adapter
- A short Ethernet cable for network connectivity
Step 1: Setting Up the Raspberry Pi
- Unbox and Connect:
- Place the Raspberry Pi near your router or within your network’s range.
- Plug in the provided power adapter to the Pi.
- Use the included Ethernet cable to connect the Pi to your router for a stable connection (preferred method). Alternatively, connect to Wi-Fi if necessary.
- Boot Up and Activate:
- The Raspberry Pi will automatically boot up when connected to power.
- Once connected to the network, the preloaded software will activate and establish a secure tunnel with the CheckoutNgo server.
Step 2: Access the CheckoutNgo Terminal Interface
The Terminal Interface serves as the central hub for managing orders and configuring receipt printers. Access it at:
https://www.terminal.checkoutngo.com/
Through this interface, you can accept or decline incoming orders, configure receipt printers, and assign specific tags to streamline your printing workflow. This ensures both order management and printer setups are handled in one convenient location.
- Login to the Terminal:
- Use your CheckoutNgo admin credentials to log in.
- Verify that the terminal is connected and displays the Tunnel Address, confirming that the Pi is operational.
- Navigate to the Printer Setup Section:
Locate the Printer Set-Up area within the interface.
Step 3: Configure Receipt Printers
In this step, you’ll assign printers and configure settings to align with your workflow.
- Add a Printer:
- Identify the IP address of the receipt printer(s) on your network. (Refer to the printer manual if unsure.)
- Enter the printer’s Name, IP Address, and assign a Tag (e.g., “Main” or “Pizza Printer”) to define its function.
- Use Tags for Custom Workflow:
- Tags allow you to direct specific order receipts to designated printers. For example:
- Assign the tag “Pizza Printer” to a printer dedicated to your pizza station.
- Assign the tag “Main” to the primary printer handling general receipts.
- Tags can be assigned to products in the Products Management section of the CheckoutNgo admin panel.
- Test Printer Connectivity:
- Use the Print Test button to ensure the printer is correctly configured and functioning.
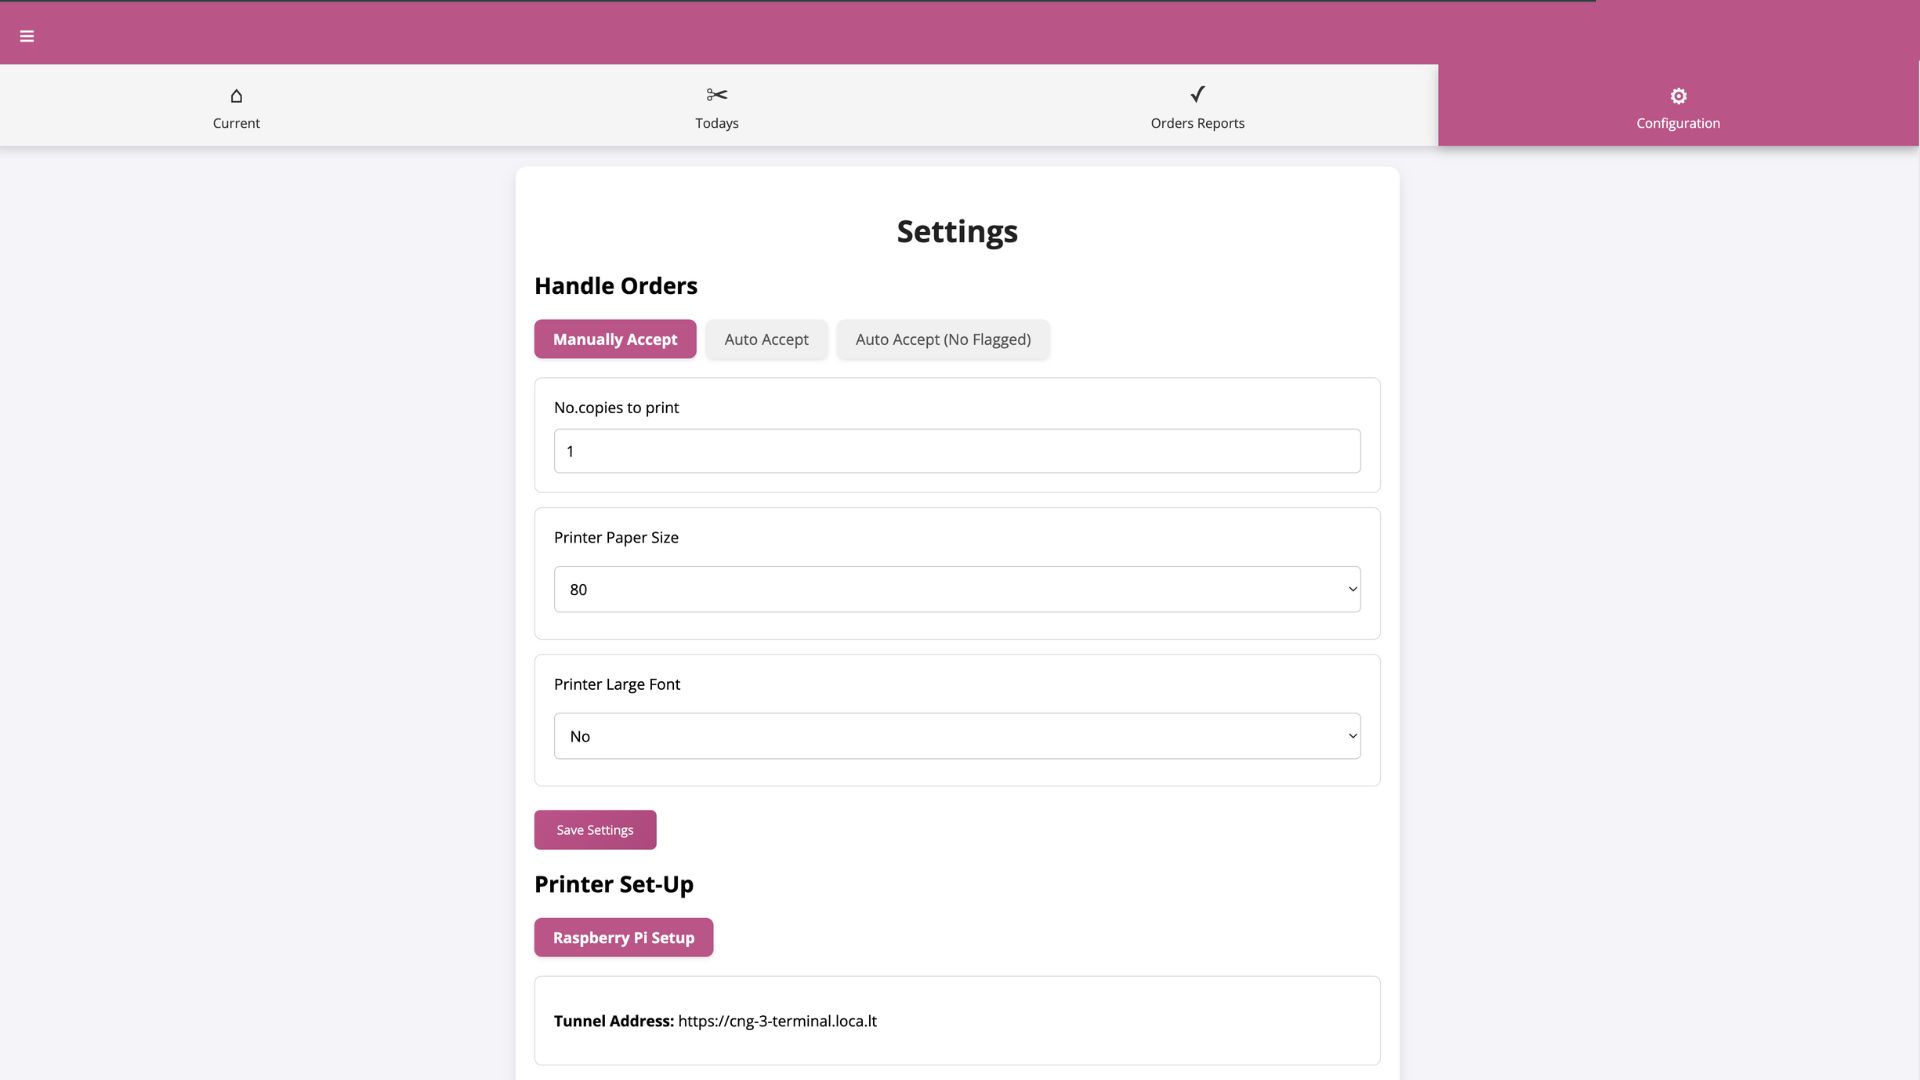
Step 4: Customize Order Handling
Within the Terminal Interface, you can define how orders are managed and printed:

- Acceptance Modes:
- Manually Accept: Admin reviews and approves orders before printing.
- Auto Accept: Orders are automatically approved and sent to the printer(s).
- Auto Accept (No Flagged): Automatically approves non-flagged orders.
- Printing Preferences:
- Set the number of copies of each receipt to print.
- Choose the appropriate printer paper size (e.g., 56, 58, 72, or 80mm).
- Enable large font for improved readability.
Step 5: Testing the Entire System
- Place a test order via your website or app.
- Verify that the order appears on the Terminal Interface.
- Confirm that the correct receipt is printed on the designated printer(s) based on the assigned tags.
Notes for Advanced Configurations
- Multi-Printer Setup: Use tags to route orders to different printers for specific tasks (e.g., a pizza station, burger frier, etc).
- Simple Setups: If the Raspberry Pi setup is not required, Bluetooth printers or Sumni devices offer a plug-and-play alternative.
By following these steps, your Raspberry Pi setup will seamlessly integrate with CheckoutNgo to manage and print receipts efficiently. This system offers flexibility for businesses of any size, ensuring smooth operations and reducing order fulfillment errors.