The Products Management section in CheckoutNgo allows you to handle every aspect of your store’s inventory and organization. Each area focuses on a specific function, enabling you to create, edit, and manage your products and their associated details seamlessly.
https://www.dashboard.checkoutngo.com/menu/products
The Products page is where you can add and manage individual items in your store. Here, you can define product details such as names, descriptions, prices, images, and SKU codes. This is also the place to update product information, assign products to categories or tags, and duplicate or delete items as needed. By keeping your product list up to date, you ensure your customers have an accurate view of what your store offers.
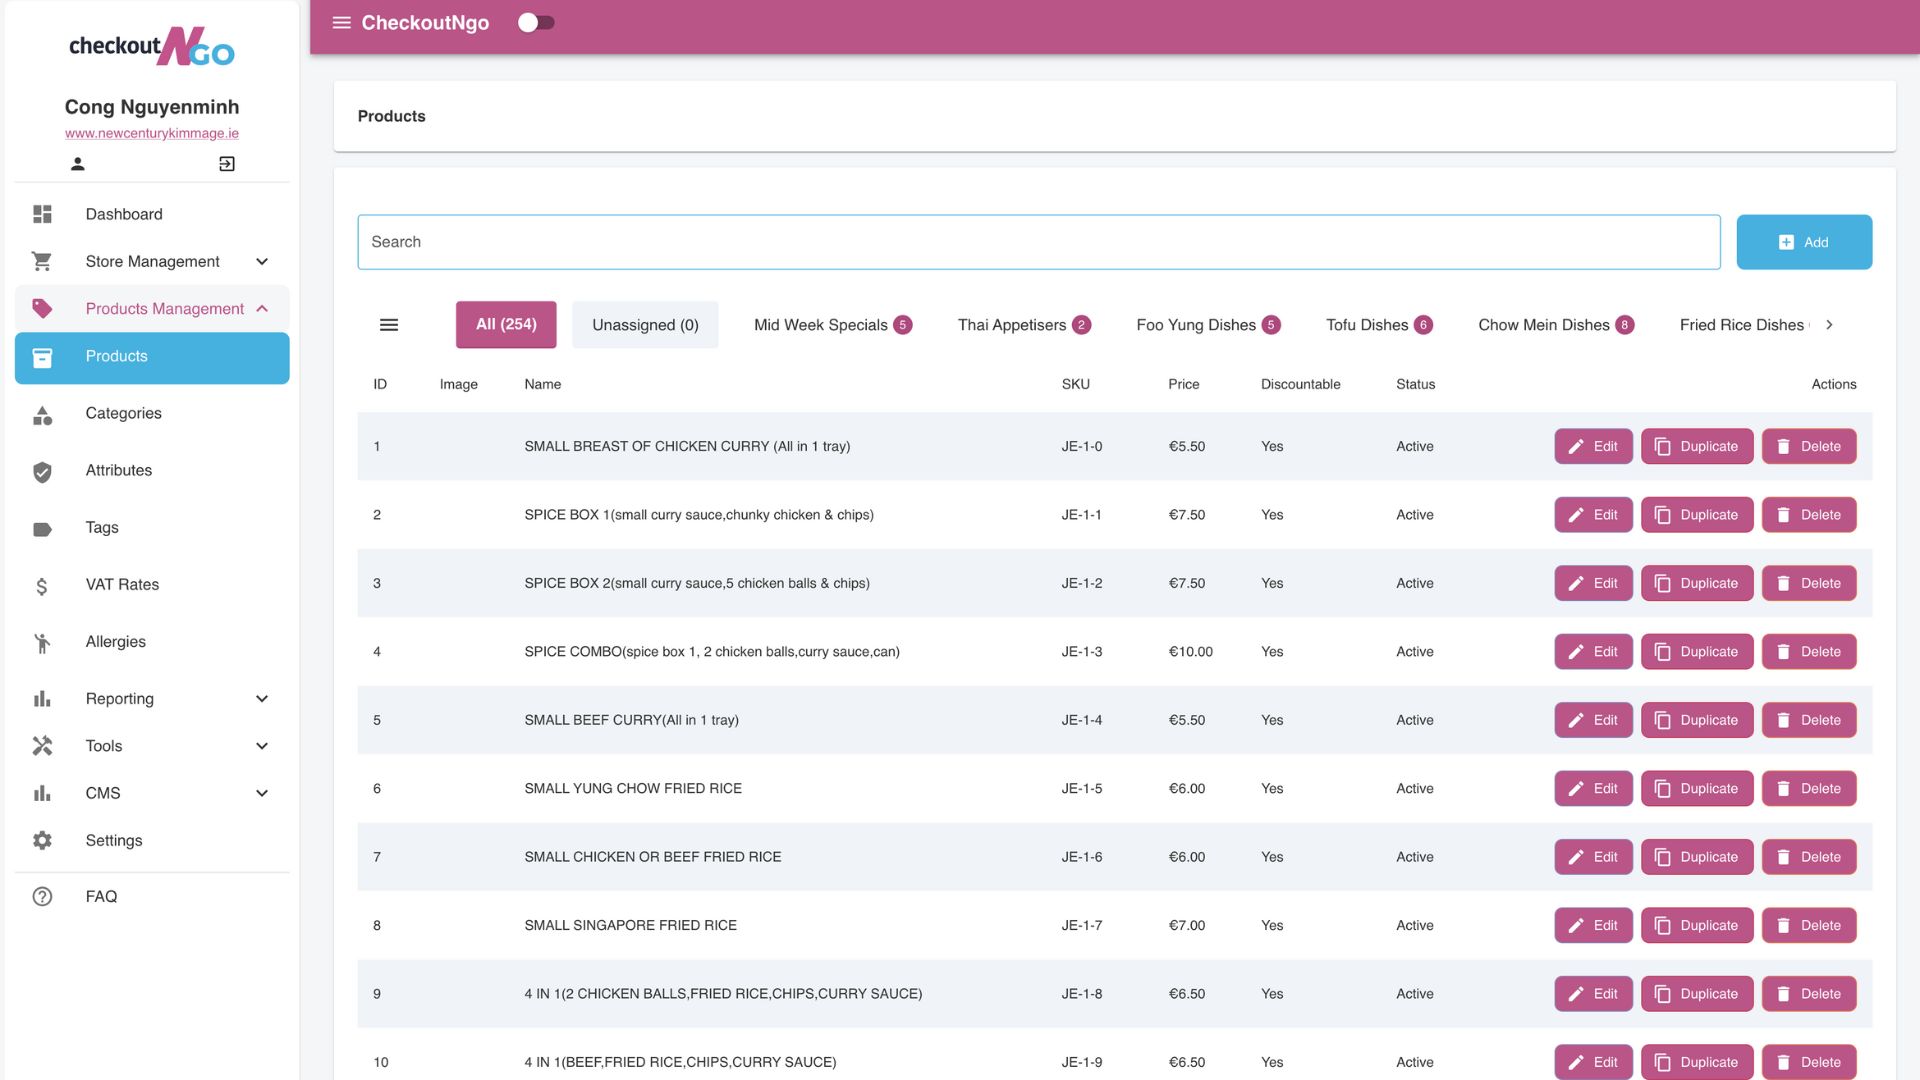
The Products Listing Page in CheckoutNgo provides a comprehensive view of all the products in your store. Products are displayed in a clean, easy-to-read list format, allowing store admins to quickly locate and manage items.
Grouping by Categories
Products are automatically grouped under the categories they are assigned to. For instance, products like a “1.25 Litre Bottle” or “1/4 Pounder & Chips” might appear under a category such as Drinks or Meals.

This logical grouping ensures a well-organised menu structure and makes it easier for admins to navigate their inventory.
Search Functionality
The built-in Search Bar at the top of the page allows admins to quickly find a specific product by typing its name, SKU, or other identifiers. This feature is particularly helpful when managing a large inventory, saving time by eliminating the need to scroll through the entire product list.
Product Actions
Each product entry includes three key action buttons:

Edit: Modify the product details, such as price, category assignment, or attributes.
Duplicate: Create a copy of the product, which can be helpful when adding similar items.
Delete: Remove the product from the system entirely if it is no longer needed.
These action buttons streamline product management, allowing for quick and efficient updates.
Visual Layout
The product listing includes helpful visual elements, such as product images, names, SKUs, prices, and current status (e.g., Active or Inactive). This layout ensures all relevant details are readily visible at a glance, aiding in efficient decision-making.

Add Product Interface: Overview and Features
The Add Product page in CheckoutNgo allows you to create a new product and configure all the necessary details for it to appear on your storefront.

Below is an explanation of the key features and sections on this interface:
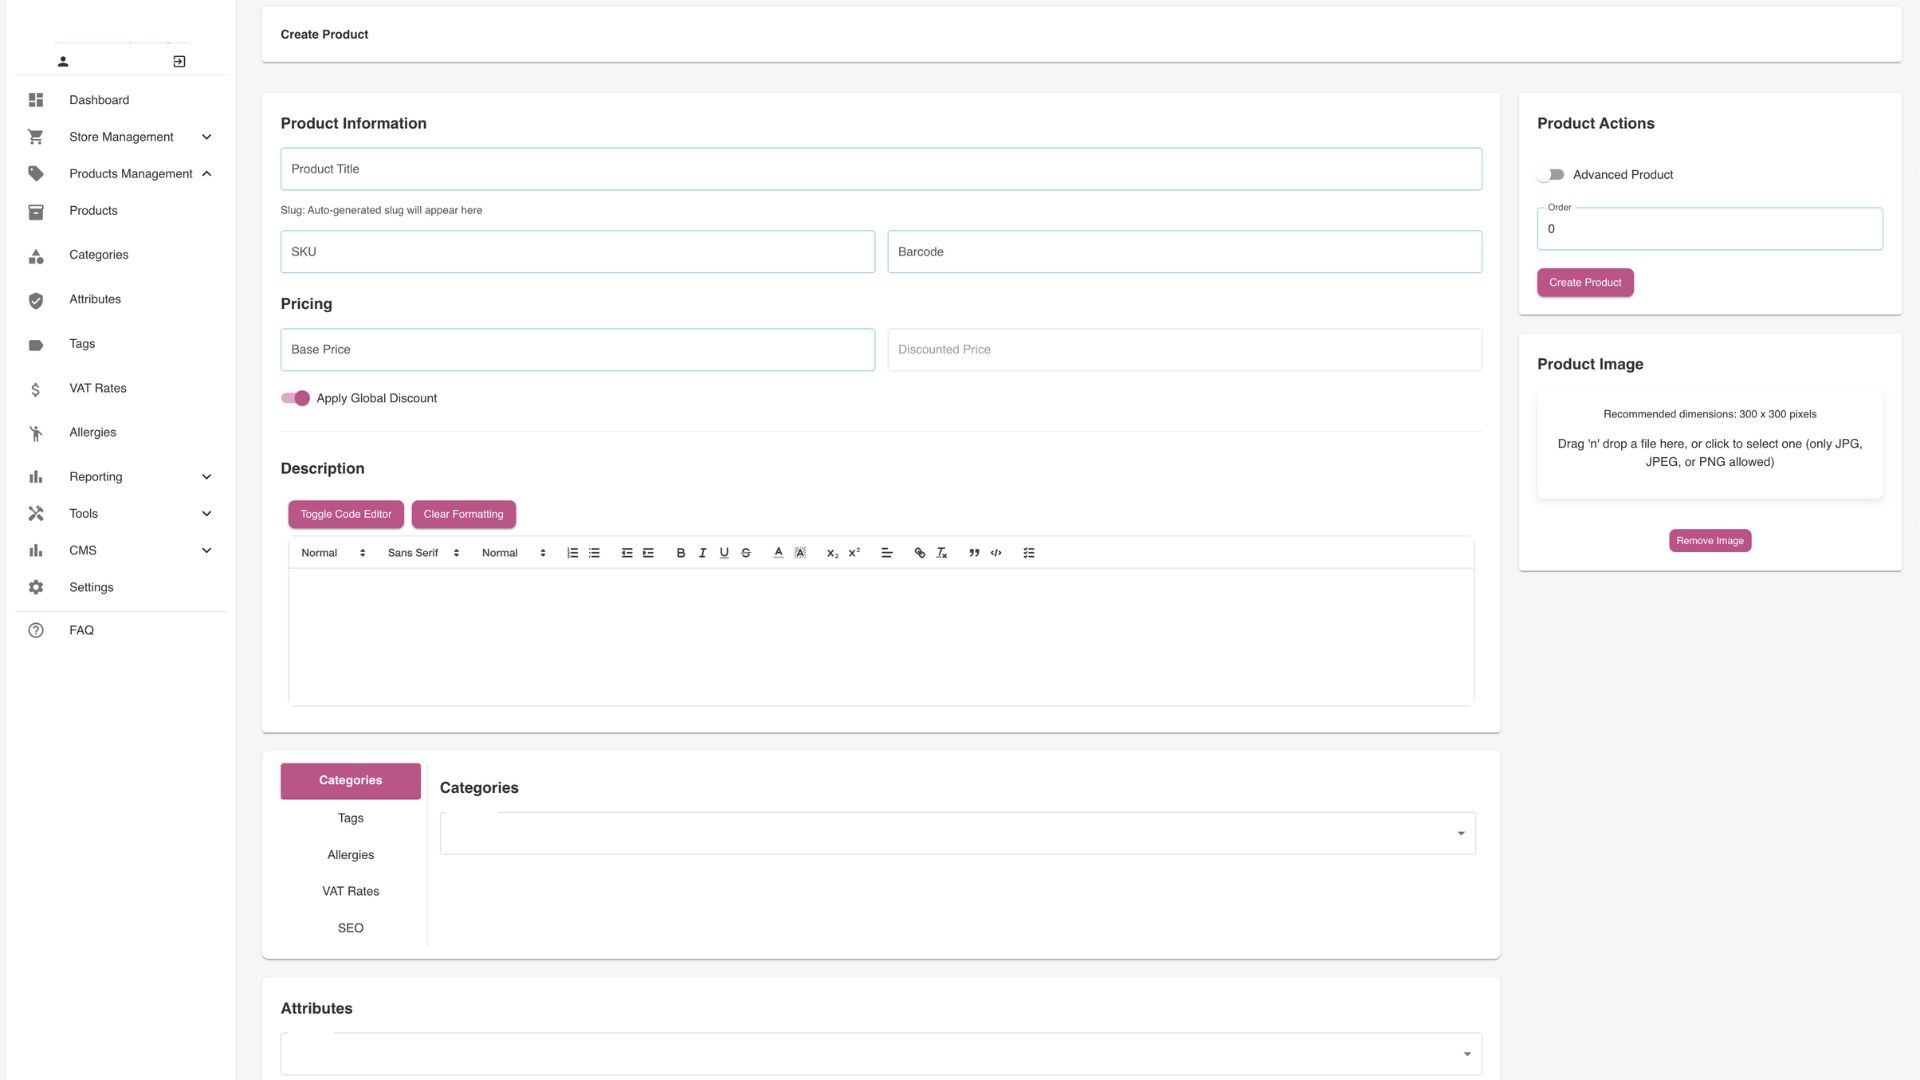
1. Product Information
- Product Title: Enter the name of the product that will be visible to your customers. This should be clear and descriptive.
- Slug: Automatically generated based on the product title. This is used in the product’s URL for easy identification.
- SKU: Provide a unique Stock Keeping Unit (SKU) code for inventory tracking.
- Barcode: If applicable, enter the barcode for the product to integrate with scanning systems.
2. Pricing
- Base Price: Set the default price for the product, which will be displayed to customers.
- Discounted Price: Optionally, provide a lower price for promotions or sales. If filled, this will override the base price on the frontend.
- Apply Global Discount: Toggle this switch to apply store-wide discounts automatically to this product.
3. Product Description
This section allows you to write a detailed description of the product, including its features, benefits, or any additional information customers might need.
- Use the text editor toolbar to format the description (e.g., bold, italics, bullet points).
Options like Toggle Code Editor and Clear Formatting provide advanced formatting controls.
4. Categories and Attributes
- Categories: Assign the product to one or more categories for better organization and navigation on the storefront (e.g., “Drinks” or “Snacks”).
- Attributes: Select pre-defined attributes (like size or drink) to offer customisation options for customers (e.g., “Small” or “Large”).
5. Additional Features
On the left-hand panel, you can configure supplementary product details:
- Tags: Add tags for easy filtering and search functionality.
- Allergies: Specify any relevant allergy information (e.g., “Contains Nuts”).
- VAT Rates: Assign the appropriate VAT rate for tax compliance.
- SEO: Configure search engine optimization settings for this product, such as meta tags or keywords, to improve visibility.
Deposit Schema (Optional): Specify deposit details if applicable to this product. This feature is activated within the Settings section of your dashboard and is really only required if you plan to par-take in the deposit return scheme for bottles and cans. Discussed in more detail later.
6. Product Image
Upload an image to visually represent the product. Drag and drop an image file (JPEG or PNG) or click the box to select a file. The recommended dimensions are 300×300 pixels for the best display.
7. Product Actions
- Advanced Product: Toggle this option if the product requires additional customisation or settings.
- Order: Assign a display order number to prioritize how this product appears in lists.
- Create Product Button: Once all required fields are filled out, click Create Product to save and add it to your store.
This page provides all the tools needed to create and customize a product comprehensively. Every detail configured here will reflect on your storefront, ensuring an accurate and professional presentation for your customers.