The Categories Section in CheckoutNgo allows you to create, manage, and organise your product categories. These categories help structure your menu and make it easier for customers to navigate your store. Whether you’re setting up a simple category or an advanced one with detailed settings, this guide will walk you through the process.
Step 1: Viewing Your Categories
When you navigate to the Categories section,
https://www.dashboard.checkoutngo.com/menu/categories
you’ll see a list of all the categories you’ve created.
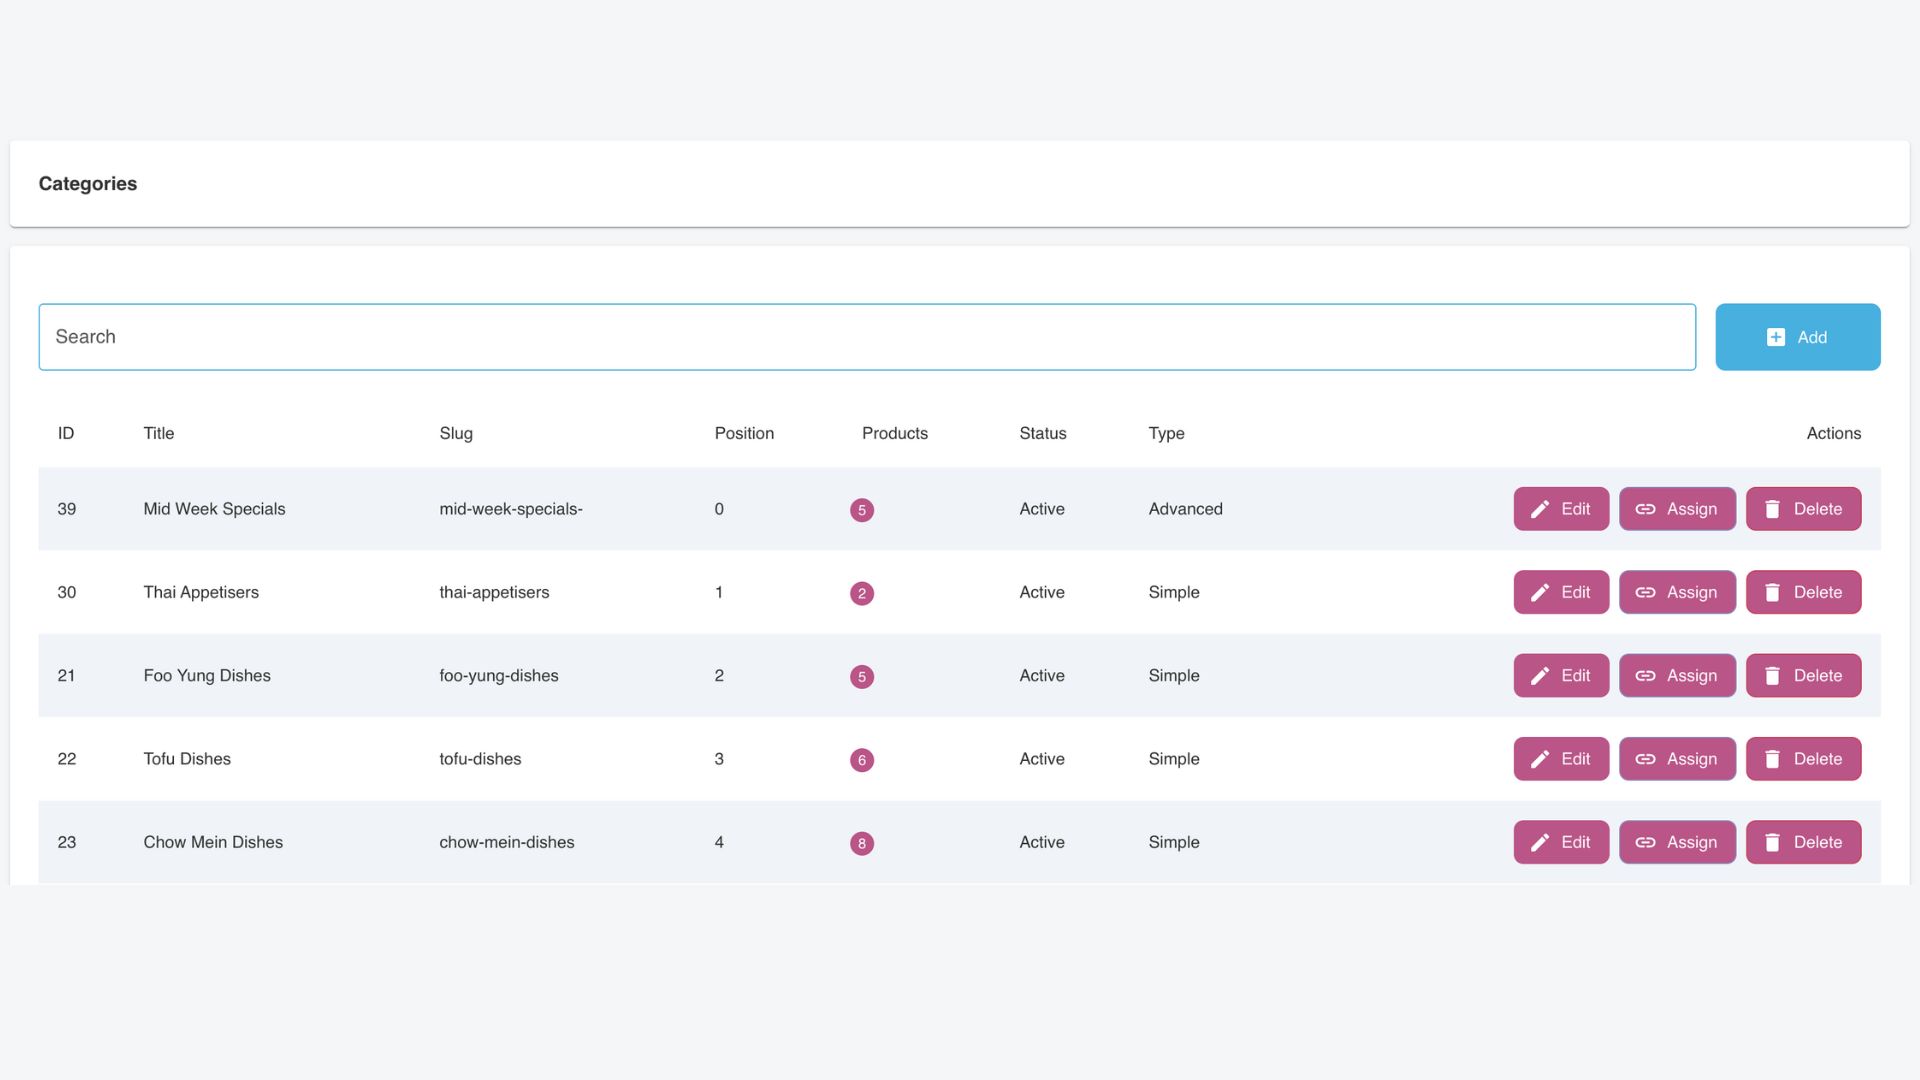
Each category is displayed with key details:
- ID: A unique identifier for the category.
- Title: The name of the category (e.g., “Tuesday Specials” or “Drinks”).
- Slug: The URL-friendly version of the category name, automatically generated based on the title.
- Position: Indicates the order in which the category appears in your menu (lower numbers appear first).
- Products: Shows the number of products currently assigned to the category.
- Status: Indicates whether the category is active or inactive.
- Type: Displays whether the category is set to Simple or Advanced. This determines the level of customisation available for the category. We’ll explore the differences below.
You can also:
- Search for Categories: Use the search bar at the top to quickly locate a category by name or details.
- Manage Categories: Use the action buttons next to each category:
Edit: Update the category’s details, such as its title, position, or type.
Assign: Link products to the category.
Delete: Remove a category if it’s no longer needed.
Step 2: Adding a New Category
To create a new category, click the blue Add button, which opens the Add New Category popup.
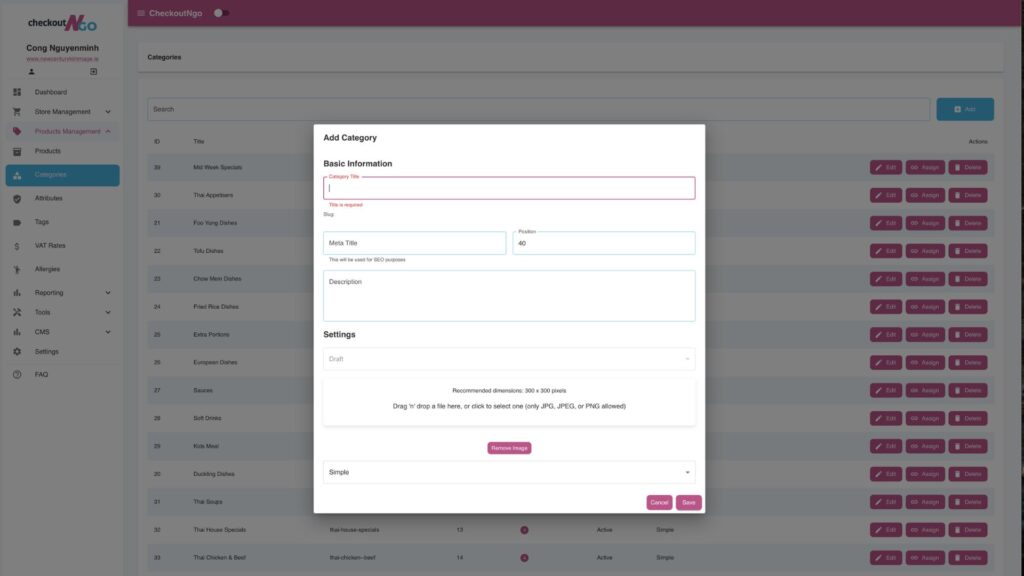
Basic Information:
- Category Title: Enter a clear, descriptive name for your category (e.g., “Lunch Deals” or “Desserts”).
- Slug: Automatically generated based on the category title.
- Position: Set the display order for the category in your menu.
- Meta Title & Description: (Optional) Add meta details for SEO purposes.
Settings:
- Published Status: Ensure the category is marked as “Published” to make it visible to customers.
- Category Image: Upload an image (recommended size: 300×300 pixels) to visually represent the category.
Advanced Settings:
If the category is set to Advanced:
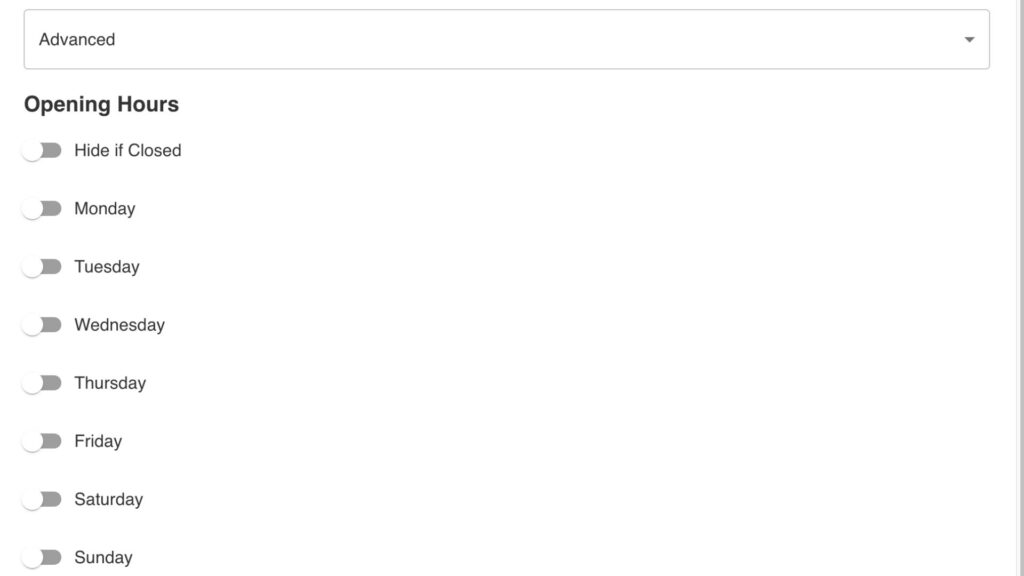
- Opening Hours: Configure specific days and times for the category’s availability.
- Hide if Closed: Automatically hide the category during its non-operating hours.
Step 3: Simple vs. Advanced Categories
The Type field allows you to set a category as either Simple or Advanced. Here’s the difference:
- Simple Category: A straightforward setup where the category is always visible, and no special conditions are applied. Ideal for static categories like “Drinks” or “Appetizers.”
- Advanced Category: Offers more control and customisation. Advanced categories can have specific operating hours, can be hidden when unavailable, and are perfect for time-sensitive menus like “Happy Hour Specials” or “Sunday Brunch.”
Step 4: Saving and Managing Your Category
Once you’ve configured the category:
- Click Save to finalize it.
- The new category will appear in the listing interface.
- Use the Assign button to link products to this category, ensuring your menu remains organised.
Tips for Managing Categories
- Use Simple Categories for static items that are always available.
- Choose Advanced Categories for dynamic offerings that depend on time or availability.
- Assign clear and customer-friendly titles for intuitive navigation.
- Keep frequently accessed categories at the top by setting a lower position number.
With the Categories Section, you can build a structured and flexible menu that improves the shopping experience for your customers. Let me know if you’d like further guidance!