The Settings section of CheckoutNgo is your central hub for managing all aspects of your online business. From defining basic business details to configuring branding, operational hours, and payment settings, this feature empowers you with total control. Each tab in the Settings interface addresses a unique area of your operations, ensuring a streamlined and professional online presence tailored to your needs.
Let’s begin by exploring the Business Info tab, the first and most fundamental step in setting up your CheckoutNgo system.
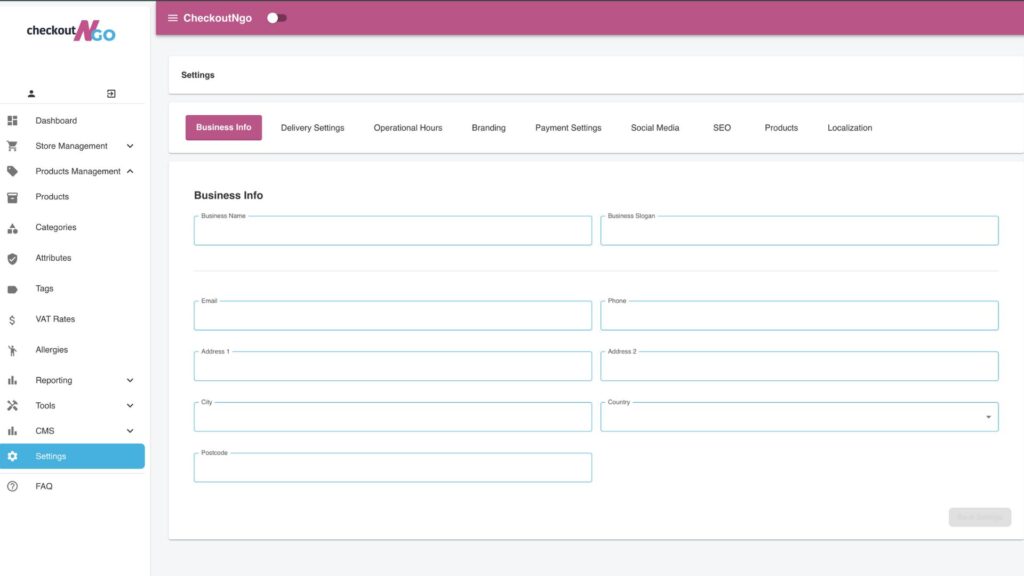
Business Info: Define Your Identity
The Business Info tab allows you to establish the key details about your business. This section is critical as it forms the foundation for your branding, customer communication, and operational details.

Here’s what you can configure on this page:
- Business Name and Slogan
Enter the official name of your business and a slogan or tagline that represents your brand. For example, a pizzeria might use a slogan like “Traditional Takeaway & Pizzeria” to convey its offerings to customers. - Contact Details
Email: Specify the email address customers can use to reach you for inquiries or support.
Phone: Add your business phone number, which will appear on your website and receipts for direct customer contact.
- Address Details
Provide the physical address of your business, including:
Address Line 1 & 2: Your full street address.
City: The city where your business operates.
Postcode: The postal code for your location.
Country: Select your country from the dropdown list. - Save Your Settings
After entering or updating your business details, click Save Settings to ensure all information is stored and reflected across your CheckoutNgo platform.
This tab serves as the foundation for your business’s online identity. By ensuring all fields are accurately filled, you establish clear communication channels and provide customers with confidence in your brand. Next, we’ll dive into the Delivery Settings tab to configure the logistics of your online operations.